This document will provide clarification and instructions on:
- How to process an over the counter part order
- Processing OTC part returns by reopening the old work order
- Processing OTC part returns by creating a new work order
If you happen to be processing a lot of OTC part orders, we recommend either:
- Creating a new customer called “OTC Parts” with an older vehicle added to the profile
- Adding a vehicle called “OTC Parts” on the profile of the customer that’s purchasing parts.
Method 1 would allow you to track metrics in regards to OTC parts sales, and method 2 would make that data specific to those customers.
It may also be beneficial to create new payment types such as "OTC Part - CC terminal" or "OTC Part - Cash". These can be added in the Shop Settings page under “Accounting.”
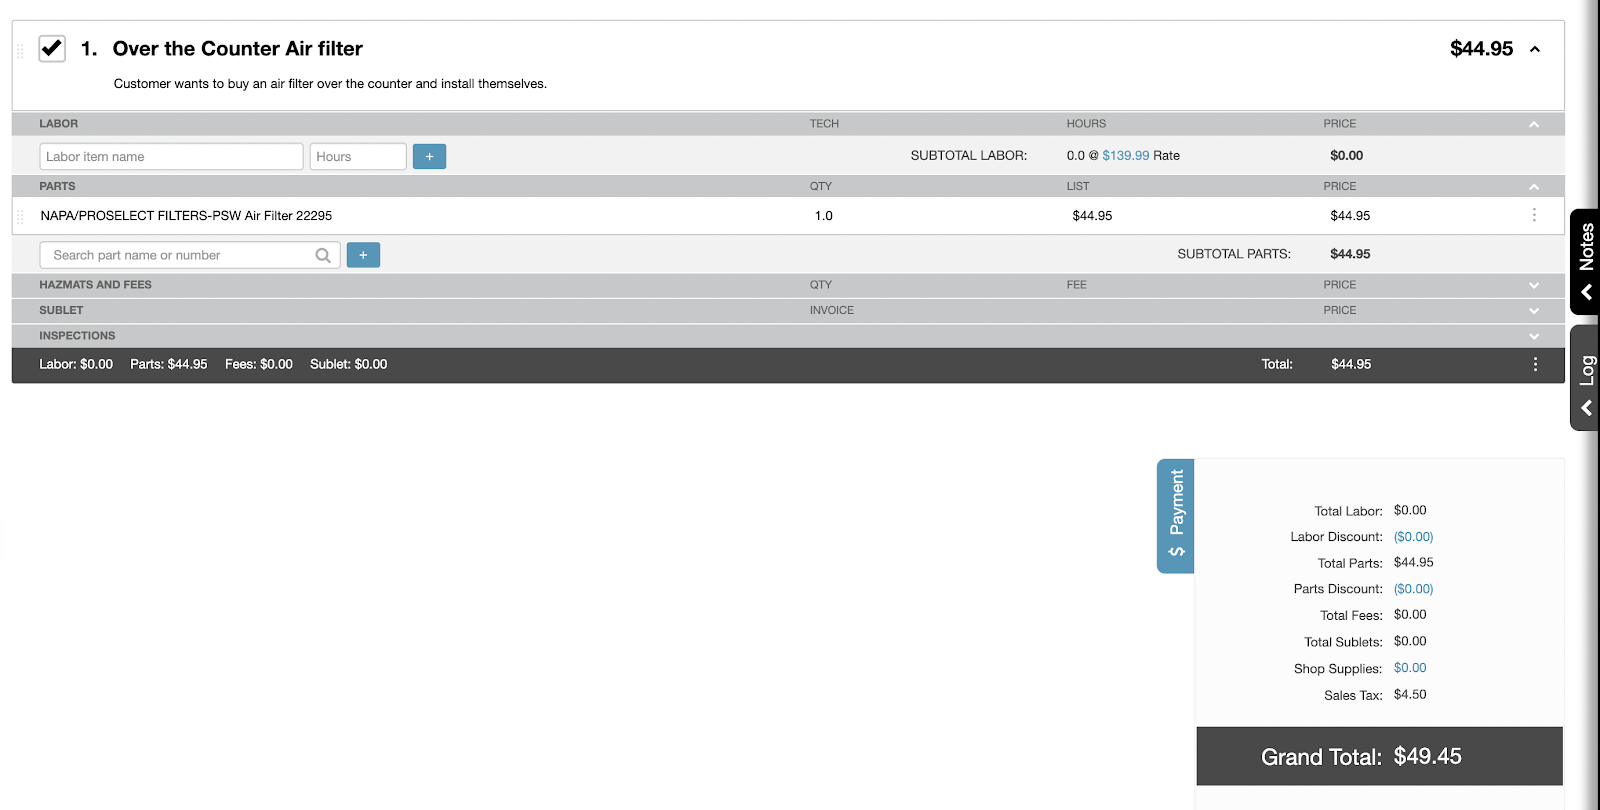
- Create a new service
- Leave the labor section blank
- Order the part
- Either through eCommerce integrations
-or-
- Manually enter the part information
Processing a Return: Reopening and amending the original RO
- Reopen the Repair
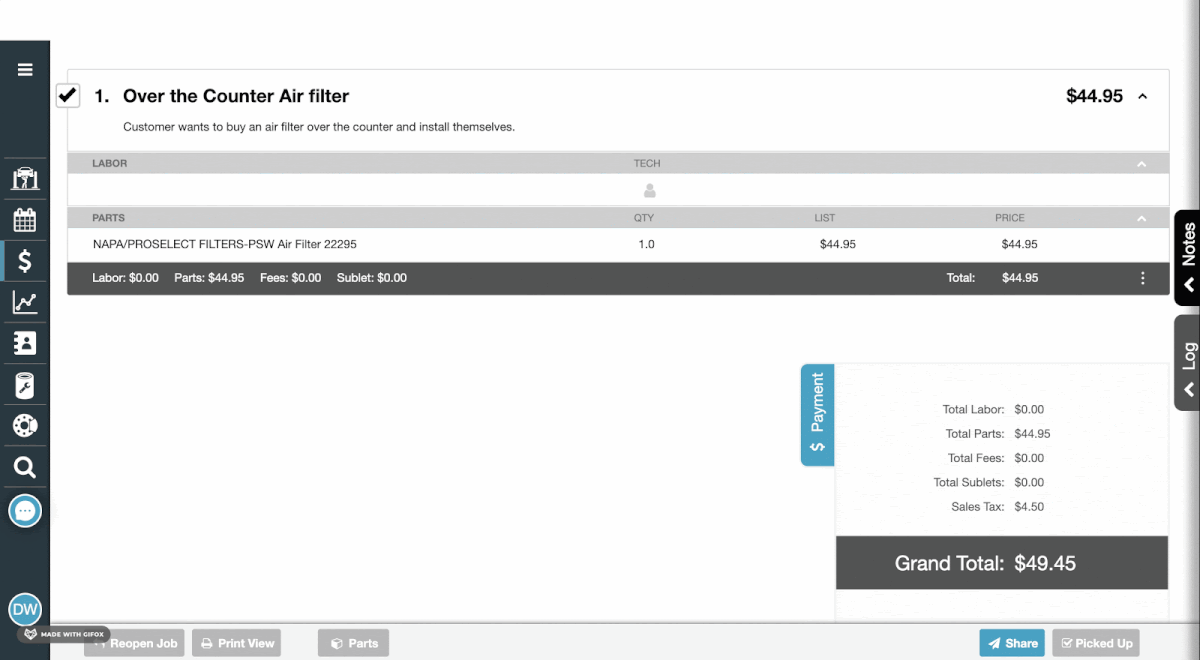
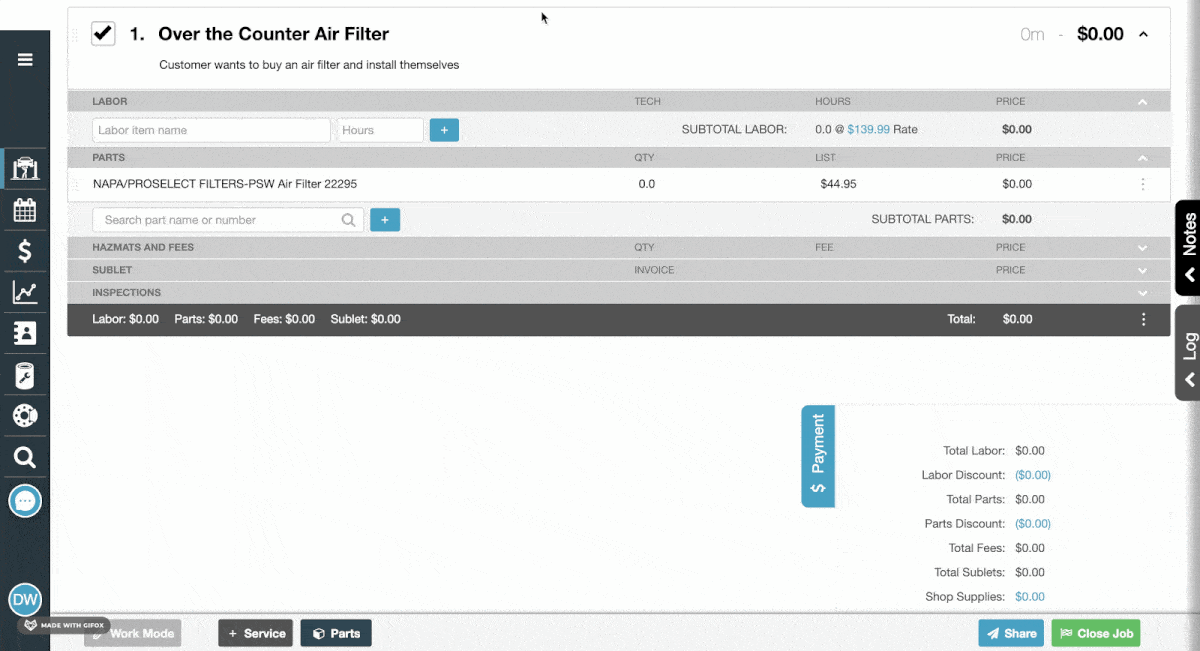
- Update the part quantity to 0 - be sure to notate the tax amount beforehand to save yourself a calculation

- Manually issue a refund on your cc machine
- Post the credit and be sure to notate that this is a refund. You can either add sales tax into the total, or separate it into a line item under “Hazmats and Fees.”
- Similar to creating a payment type specifically for OTC parts, you can even create a payment type called “Refund” if you wish to track this in your reporting

- Upon closing the RO, you will be presented with a modal that allows you to keep the original date of the part purchase as the closing date of the return order.

Processing a Return: Open a new RO
If you are using this method, it’s important to remember that it will impact your RO and car count metrics, as it is creating an entirely new RO.
- Open a new work order for the part

- Edit the part price and convert it to a negative amount

- Add negative sales tax in the final total or as a line item under “Hazmats and Fees.” Note: it must be added in as a positive amount, and then edited to be negative afterwards.
- Post the negative amount as a credit

- Navigate to the parts screen to adjust the inventory of that SKU manually
